
6 beautiful photography tips with little known iPhone
1. "DISTRIBUTION" WITH PANORAMA SHOPS
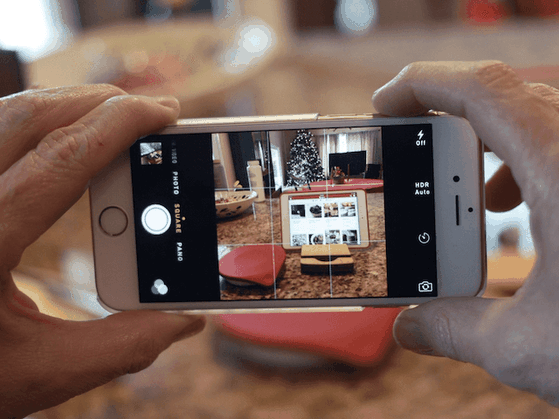
Previously, Panorama (panorama) is often used by photographers to describe the grandeur and splendor of the natural landscape, with complex shooting and post-production steps. Since Panorama mode is integrated on the iPhone, the "composing" of photos is no longer too difficult, but also because of that Panorama image is no longer attractive.
However, you can completely make your photo unique with a subject that is repeated many times throughout the picture. Well, it looks like a collage, but the background is completely seamless, and "how can it be done?" - many people will utter that when looking at your photo. It is because of the shooting distance stretching from left to right combined with the slow movement speed that you can create this type of image.

Predetermine the positions you want to appear in the picture frame, ask a friend to pan from left to right, starting from where you are. After you're out of the main frame, run around the back of your friend to continue to appear in the frame on the right. Such turn until the picture is over.
A good shot in this case should only appear 3 or 4 times in the picture frame, so that the image is not distorted, losing its natural appearance. Also, notice the shadow (if shooting outdoors), make sure the machine has swept all the shadows you have just moved. You can also use this mode to take commemorative photos when there are too many people that regular lenses can't take.
2. Capture HDR
HDR is an acronym for the phrase High Dynamic Range. When HDR is turned on, the camera will take many photos in the same subject, then they will be combined to produce the best picture.
Dark parts on the image will be added with light and brighter parts will be darkened. HDR can work thanks to the support of iOS software (since iOS 4.1). Click on the word HDR in the shooting interface and you will see options to enable or disable HDR similar to the way you use the flash.

If you choose to take HDR photos, the iPhone will always take two pictures: normal and HDR optimized images. From here, you will decide whether you want to save both photos or delete photos you don't like. If you want, you can also set the iPhone to capture only one HDR image.
3. USE "NETWORK" TO PHOTO ALWAYS "STRAIGHT"
When enabling grid mode in the photography interface, you can be sure that the horizon will always be upright on your photo. This feature has been added by Apple since iOS 5. The grid is turned off by default; You can turn it on via Settings - Camera - Grid (Settings - Camera - Grid). The grid will not appear on the image, but it will only assist you in the process of taking photos only.
4. Use flash
Since the launch of iPhone 4, the iPhone camera has flash. Thanks to the flash, you can take better pictures in low light conditions. You have three options for flash: Off, On or Auto. In the third option, the iPhone will determine if your photo needs to be flashed, from which it will automatically flash if the light is low.
The latest recent developments are True Tone flash and Slow Sync flash (slow sync flash) available on iPhone 8 or newer.
True Tone flash has appeared on the iPhone 6 and it helps the flash emitted light match the skin tone of the person you want to capture. To do this, Apple used a flash with four small LED lights inside, if your eyes could see them.
The Slow Sync flash will combine with a slower shutter speed (the shutter opens for a relatively long time, to create special motion effects for the photo). It helps the subject in front of the glass can be clearly seen in moderate light conditions and the rear background can also be seen quite clearly.
5. Adjust the exposure of the image
By clicking the screen, you can also adjust the exposure. If a part of the image is very dark, you can press that dark area to improve the exposure. At this point, you see a sun icon on a slider, drag this slider up to increase the brightness or pull down to lighten the area you choose.
![[​IMG]](https://farm9.staticflickr.com/8364/8286678002_73650d499a_b.jpg)
As a result, the dark part will be pushed up and other parts of the image may be overexposed (bright fire), so you should experiment a bit to find the right balance between light and shadow. Dark in your photo before shooting.
Previously, Panorama (panorama) is often used by photographers to describe the grandeur and splendor of the natural landscape, with complex shooting and post-production steps. Since Panorama mode is integrated on the iPhone, the "composing" of photos is no longer too difficult, but also because of that Panorama image is no longer attractive.
However, you can completely make your photo unique with a subject that is repeated many times throughout the picture. Well, it looks like a collage, but the background is completely seamless, and "how can it be done?" - many people will utter that when looking at your photo. It is because of the shooting distance stretching from left to right combined with the slow movement speed that you can create this type of image.
Predetermine the positions you want to appear in the picture frame, ask a friend to pan from left to right, starting from where you are. After you're out of the main frame, run around the back of your friend to continue to appear in the frame on the right. Such turn until the picture is over.
A good shot in this case should only appear 3 or 4 times in the picture frame, so that the image is not distorted, losing its natural appearance. Also, notice the shadow (if shooting outdoors), make sure the machine has swept all the shadows you have just moved. You can also use this mode to take commemorative photos when there are too many people that regular lenses can't take.
2. Capture HDR
HDR is an acronym for the phrase High Dynamic Range. When HDR is turned on, the camera will take many photos in the same subject, then they will be combined to produce the best picture.
Dark parts on the image will be added with light and brighter parts will be darkened. HDR can work thanks to the support of iOS software (since iOS 4.1). Click on the word HDR in the shooting interface and you will see options to enable or disable HDR similar to the way you use the flash.
If you choose to take HDR photos, the iPhone will always take two pictures: normal and HDR optimized images. From here, you will decide whether you want to save both photos or delete photos you don't like. If you want, you can also set the iPhone to capture only one HDR image.
3. USE "NETWORK" TO PHOTO ALWAYS "STRAIGHT"
When enabling grid mode in the photography interface, you can be sure that the horizon will always be upright on your photo. This feature has been added by Apple since iOS 5. The grid is turned off by default; You can turn it on via Settings - Camera - Grid (Settings - Camera - Grid). The grid will not appear on the image, but it will only assist you in the process of taking photos only.
4. Use flash
Since the launch of iPhone 4, the iPhone camera has flash. Thanks to the flash, you can take better pictures in low light conditions. You have three options for flash: Off, On or Auto. In the third option, the iPhone will determine if your photo needs to be flashed, from which it will automatically flash if the light is low.
The latest recent developments are True Tone flash and Slow Sync flash (slow sync flash) available on iPhone 8 or newer.
True Tone flash has appeared on the iPhone 6 and it helps the flash emitted light match the skin tone of the person you want to capture. To do this, Apple used a flash with four small LED lights inside, if your eyes could see them.
The Slow Sync flash will combine with a slower shutter speed (the shutter opens for a relatively long time, to create special motion effects for the photo). It helps the subject in front of the glass can be clearly seen in moderate light conditions and the rear background can also be seen quite clearly.
5. Adjust the exposure of the image
By clicking the screen, you can also adjust the exposure. If a part of the image is very dark, you can press that dark area to improve the exposure. At this point, you see a sun icon on a slider, drag this slider up to increase the brightness or pull down to lighten the area you choose.
As a result, the dark part will be pushed up and other parts of the image may be overexposed (bright fire), so you should experiment a bit to find the right balance between light and shadow. Dark in your photo before shooting.


Leave a Comment